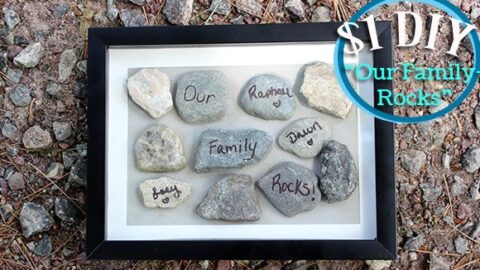

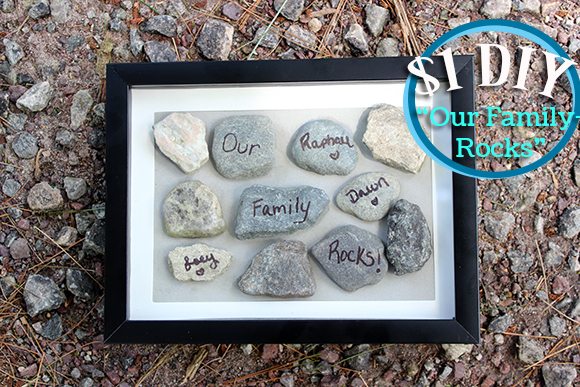
A while ago I spotted the cutest gift, it was actually a print and not actual rocks. But it read "Our Grandpa Rocks" and has all the names of the children in the family printed on surrounding rocks. That framed print is $40 and I just couldn't justify paying for it as cute as it is, but I put it on my to-do list to try to create something similar. The major difference is that I used real rocks because hey... rocks are free. You could also purchase them really inexpensively though, they'd look nicer and smoother. I was tempted, but for the purpose of seeing how cheap I could make my own version I stuck with the real deal.
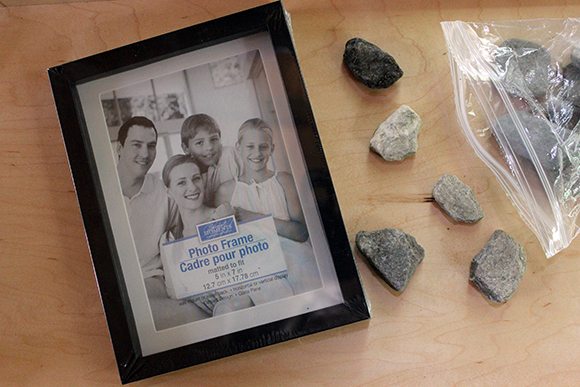
The original frame size was 16" x 16" but the Dollar Tree only had deep frames in a smaller size which was 5" x 7" which is probably just as well because the rocks are a bit dense and heavy. Total cost was $1 for the frame! Rocks were free and I already had glue and a permanent marker at home. After picking up my frame from the dollar store, I went on a mission to find flat and smooth rocks.I grabbed a few extra so that I could see which ones would fit and work together. I'd also suggest trying to find some with varying colors for contrast.
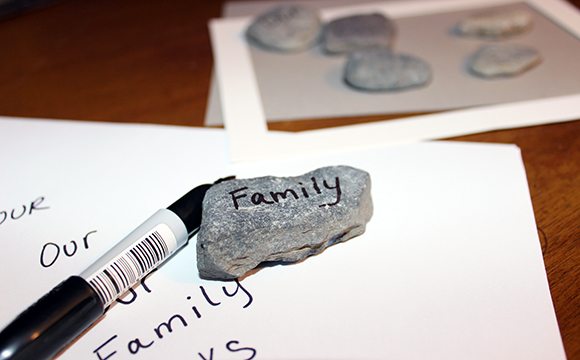
Once I found my rocks, I made sure to clean them thoroughly before using. Then I spaced them out in the order that I wanted them on the frame. I used the promotional cardboard that came in the frame as my backboard. If you find yours isn't sturdy enough, you can also find some heavier stock or cardboard around the house to use instead. On the rocks that I chose to write on, I used a permanent marker. You could opt to use a whole array of products instead or even fancy it up with different colors, I think a permanent marker should hold up really nicely though.
The last step is to glue each rock into place. You'll want to use a glue gun or something extremely heavy duty to ensure the heavy rocks stick. Once your project is dry, you can put it into the frame and it's ready! It's really a simple project, which is why I enjoyed it so much!
What You Need:
✔ Small deep frame or Shadow Box
✔ Flat Smooth Rocks
✔ Glue Gun or Heavy Duty Glue
✔ Permanent Marker
What To Do:
Make sure you have a sturdy enough surface for your rock picture. Check to see if the promotional cardboard inside your frame is thick enough to support glued rocks. If not, find a heavy cardstock or piece of cardboard around the house and trim to size. Spread your rocks out and figure out which ones will look best with writing on them. Use a permanent marker or similar to write on the rocks. hen, glue them into place. Wait for them to dry and voila that is it! You rock!
This project is so versatile! You can use it for any theme. I opted to do "Our Family Rocks" and added our names. You could do almost anything such as "Our Teacher Rocks" and add students names or reasons why he or she rocks or for Mother's, Father's Day. I don't know, but I just find that irresistibly cute! It makes a great affordable DIY gift that your child can help make.
Note: Thank you to our sponsor Top Cash Back who made this project possible! Their service is fast growing, so you'll want to get signed up to get in on all of the action! On top of all the awesome freebie cash back deals they have in store, you can also earn $10 for every friend you refer. Once your friend earns $10 cash back, you will get paid too! You will find free offers like Maybelline and Cover Girl select cosmetics to gift cards and even cookies! Don't miss any more of their hot offers, get signed up today!


Trisha B.
Wednesday 22nd of January 2014
This is such a great idea, I love it! I plan on making one or maybe even two or three...lol. These would make perfect gifts for super cheap. I'm so glad that I came across this. You Rock!!!
Wendi S
Friday 3rd of January 2014
Cute! What makes this idea perfect for me is the boys love keeping rocks everywhere we go. Thank you!
Terry (My Journey With Candida)
Wednesday 14th of August 2013
I love this idea... how clever of you to think of it.
Stefani
Wednesday 31st of July 2013
This is a really cute idea. My 9 year old loves to collect rocks and would think this is great!
Brett
Tuesday 30th of July 2013
this is positively adorable! i love it!!